If you manage more than a few hundred Shopify products, you already know the problem: a supplier raises their cost, a promotion kicks in, or MAP compliance requires a sweep across dozens of brands — and Shopify's built-in price editor simply can't handle it cleanly at scale.
In this guide I'll show you exactly how to bulk update prices in Shopify using Matrixify — the tool I use daily to manage 50,000+ SKUs across 150+ brands. I'll also cover the MAP/UMRP compliance checks you should run before every price publish, and the mistakes that silently break catalogs when people rush this process.
Shopify store owners and catalog managers handling 500+ SKUs who need reliable, repeatable bulk price updates without breaking variants, compare-at prices, or brand compliance rules.
Why Shopify's Built-In Price Editor Fails at Scale
Shopify's native bulk editor works fine for 10–20 products. But once you're managing hundreds of SKUs across multiple brands, it breaks down fast:
- No filtering by vendor or product type — you can't isolate one brand's SKUs easily
- No formula-based pricing — you can't say "raise all prices in this collection by 8%"
- No compare-at price logic — sale pricing requires manual entry per variant
- No audit trail — if something goes wrong, there's no easy rollback
- Session timeouts on large catalogs — the editor can fail mid-save on 1,000+ SKU updates
Matrixify solves all of this by letting you work in Excel or Google Sheets — where you have full formula control — then importing the changes as a structured CSV. You get a full log of every change, sandbox testing before live updates, and the ability to roll back with a previous export.
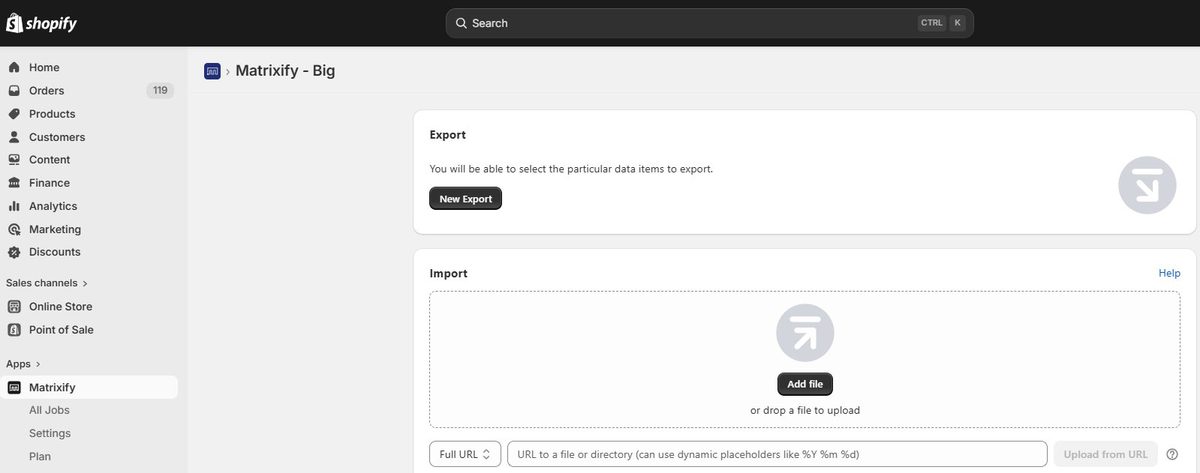
The Matrixify dashboard inside Shopify Admin — your starting point for all bulk operations.
Step-by-Step: Bulk Price Update via Matrixify CSV
Here's the exact workflow I use for every price update — whether it's 50 SKUs or 50,000.
Export your current product data
In Matrixify, go to Export → Products. Select the columns you need: Handle, Title, Variant SKU, Variant Price, Variant Compare At Price. For brand-specific updates, filter by Vendor before exporting.
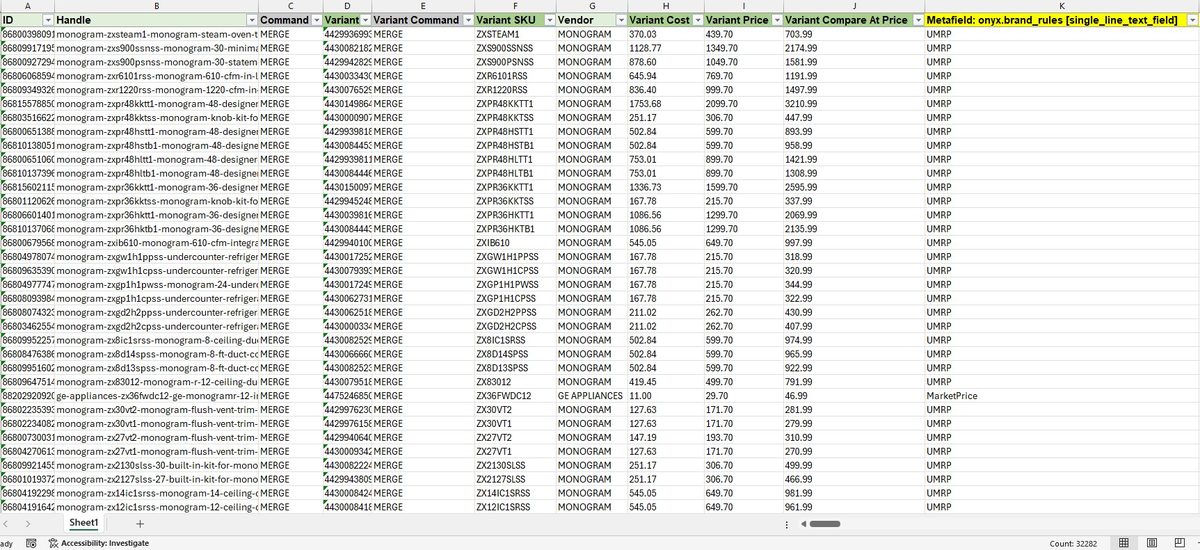
Open the CSV in Excel or Google Sheets
Never edit raw CSV in a text editor — date fields and leading zeros will corrupt. Open in Excel and format the Variant Price column as Number, not Currency, to avoid import errors.
Build your new price column with formulas
Add a "New Price" column. Use formulas like =ROUND(B2*1.08, 2) for an 8% increase, or reference a cost sheet with =ROUND(cost*markup, 2). Always round to 2 decimal places — Shopify rejects prices with more than 2 decimal places.
Never use Excel's Currency format on price columns before exporting to CSV. It adds currency symbols ($) that cause Matrixify to reject the entire row silently. Use Number format with 2 decimal places only.
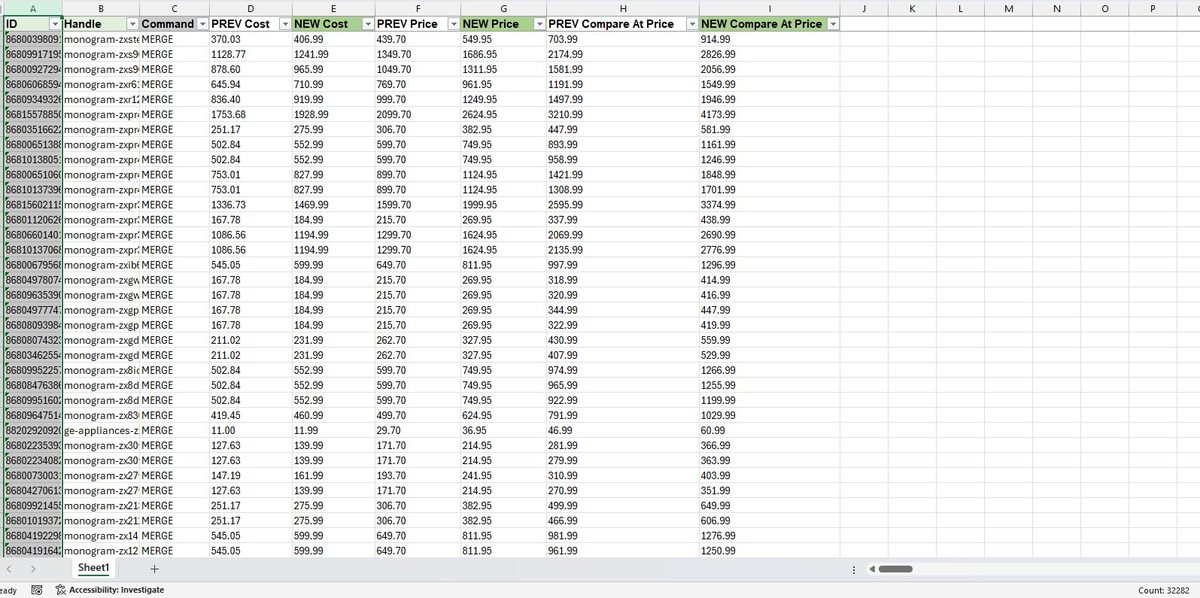
A before/after price column setup in Excel. Column C uses =ROUND(B2*1.08,2) for an 8% increase.
Paste new prices into the Variant Price column
Copy your New Price column and paste as values only (not formulas) into the Variant Price column. Delete the helper column. Save as CSV UTF-8.
Import to Matrixify — sandbox first
In Matrixify, go to Import → Products. Upload your CSV. Before clicking Import, enable the Dry Run option. This simulates the entire import without writing any changes to your store — it catches errors before they go live.
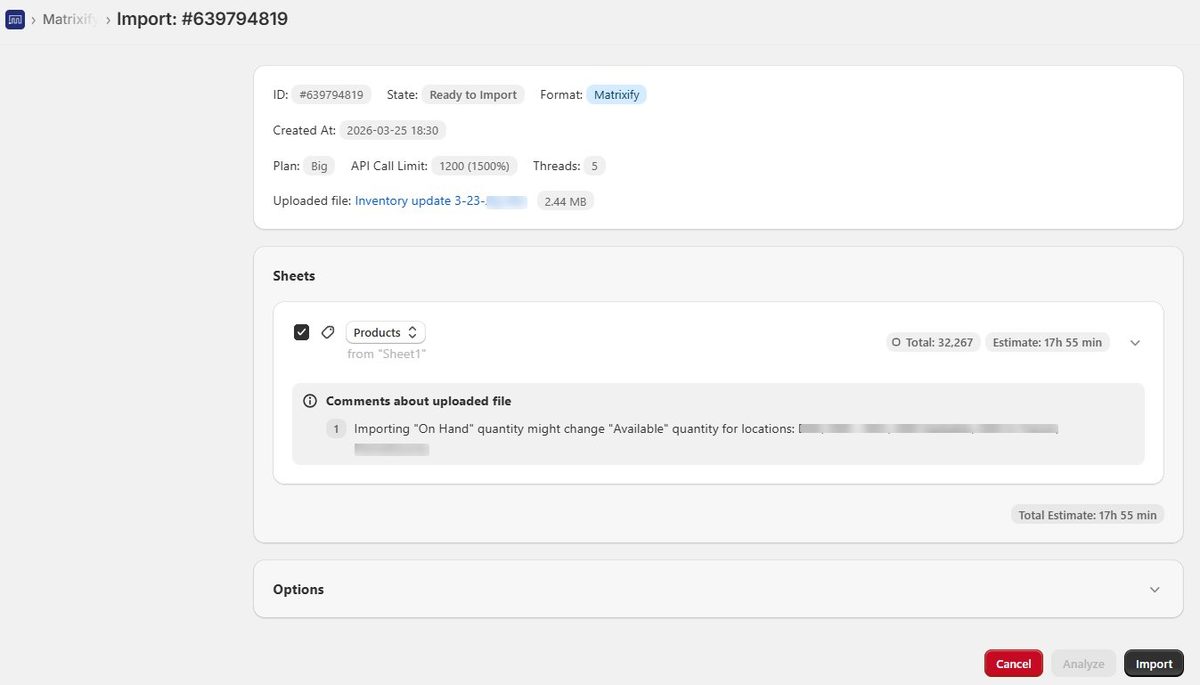
Always run a Dry Run first. Matrixify will show you exactly what would change — with error counts — before committing anything to your live store.
Review the dry run results and run the live import
Check the results file. Look for any rows marked as errors or skipped. Fix those rows in your CSV, re-run the dry run, then execute the live import once it's clean.
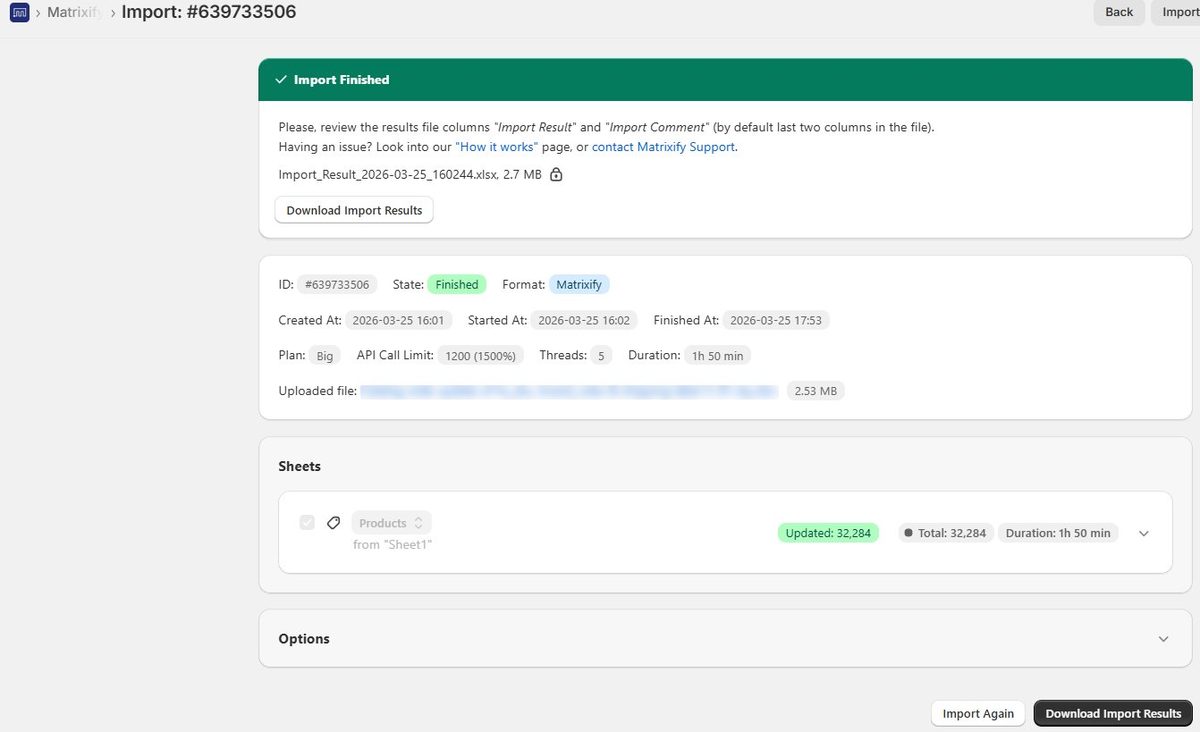
The Matrixify results screen after a successful import. Green rows updated, red rows flagged for review.
MAP & UMRP Compliance — What to Check Before Publishing
This is where most catalog managers get into trouble. MAP (Minimum Advertised Price) and UMRP (Unilateral Minimum Resale Price) policies set by brands mean you can't just push any price — you need to verify compliance before every publish, especially after a cost-up or supplier price change.
Here's what I check on every price update job:
| Check | What to Verify | Risk if Skipped |
|---|---|---|
| MAP floor | No variant price falls below the brand's MAP | Brand violation, account termination |
| UMRP ceiling | No variant exceeds the brand's max resale price | Lost buy box, brand relationship damage |
| Compare-at price | Sale price still clears MAP after discount | FTC compliance issues on "was/now" pricing |
| Bundle pricing | Bundle price doesn't imply individual price below MAP | Brand complaint, bundle listing pulled |
| Variant consistency | All variants of the same product priced consistently | Shopify search ranking issues |
Applying a blanket percentage discount to a brand's catalog without checking each SKU against MAP first. Even one violating variant can trigger a brand compliance review. Always filter by brand and check against your MAP sheet before running the import.
The Columns You Actually Need in Your CSV
A common mistake is exporting all columns and editing the full file. This creates noise and increases the risk of accidentally overwriting fields. For a price-only update, you only need four columns:
The Handle is the unique identifier Matrixify uses to match rows to products. Without it, every row fails. The Variant SKU is your secondary identifier for matching specific variants. Keep all other columns out of the file unless you intend to update them.
Common Mistakes That Break Your Catalog
1. Importing without a dry run
I've seen stores push 3,000 price updates and have 800 variants silently zeroed out because of a CSV formatting error. Always dry run. It takes 2 extra minutes and saves hours of cleanup.
2. Forgetting to update compare-at prices
If you raise your regular price but forget to update the compare-at price, Shopify will show the product as "on sale" when it isn't — or worse, show a lower "was" price than your new regular price, which looks broken to customers.
3. Using the wrong Handle
If you've recently changed product handles (for SEO or URL restructuring), your export from last month won't match. Always use a fresh export as the base for any import — never reuse old CSV files.
4. Not keeping the pre-update export
Before every import, save your dry-run export as a backup. If a client calls an hour after a price update saying something looks wrong, you need that file to roll back cleanly.
Name your backup files with timestamps: products-export-2026-03-24-pre-update.csv. After 6 months you'll thank yourself when a client asks "what were our prices before the March update?"
When to DIY vs. Hire a Specialist
Matrixify is powerful, but it rewards experience. Here's an honest breakdown:
| Situation | DIY or Specialist? |
|---|---|
| Under 500 SKUs, simple price increase, no MAP rules | DIY — this guide is enough |
| 500–5,000 SKUs, multiple brands, basic MAP compliance | DIY with caution — budget time for testing |
| 5,000+ SKUs, cost-up pricing, strict MAP/UMRP enforcement | Specialist — the cost of one error exceeds the service fee |
| Recurring monthly updates across 10+ brands | Specialist on retainer — consistency and time savings |
| Migration from another platform, metafield restructuring | Specialist — high risk of data loss without experience |
Summary
Bulk price updates in Shopify don't have to be risky. With the right Matrixify workflow — clean CSV, dry run first, MAP compliance check, and a pre-update backup — you can update thousands of prices confidently in under an hour.
The key habits that separate clean catalog operations from messy ones:
- Always dry run before a live import
- Use minimum required columns only
- Check MAP/UMRP compliance before every publish
- Keep dated backups of every pre-update export
- Never reuse old CSV files as import templates
Not sure if your catalog pricing is clean?
Download the free Shopify Catalog Health Checklist — 24 checks covering pricing, variants, metafields, and compliance. Used by stores managing 500 to 50,000+ SKUs.
Get the Free Checklist → Or request a free catalog audit — I'll review up to 200 SKUs and send a written report.